Developing Oracle from VS Code
Overview
Since My favorite code editor is MS VS Code, for developing oracle database understanding how to install plugin for oracle.
Enviroments
OS:Windows 10 64bit
VScode :1.44.2
Oracle :Oracle 18c XE
Step1 : Installation of “Oracle Developer Tools for VS Code”
Open your VS Code and find plugin ‘Oracle Developer Tools for VS Code’ and click the install button.

You may get this warning at this time.

Because this plugin needs .Net core Runtime, you have to get it from the following website.
https://www.oracle.com/database/technologies/appdev/dotnet/install-dotnetcore-windows.html
You have to reboot VS Code after installation of .Net core runtime.
If you don’t get this message, maybe you already have .Net so pass this procedure.
After reboot of VS Code, you can find Oracle Developer Tolls for VS code is enable as extension plugin.

Step2 : Connection to Oracle
Now let’s connect your oracle database with the plugin.
At first click the Database icon and ‘+’ .

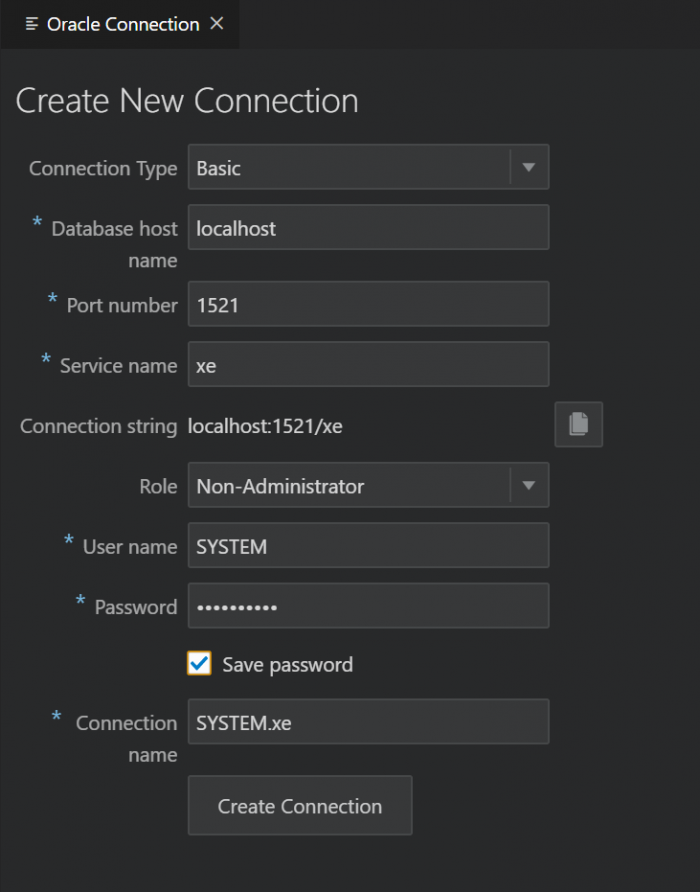
Then it shows input tab for connection definition. Please put your database connection information and click the ‘Create Connection’.
In this case of using Oracle Express Edition, Default Service Name is ‘xe’ and Role should be set Non-Administrator with SYSTEM user.

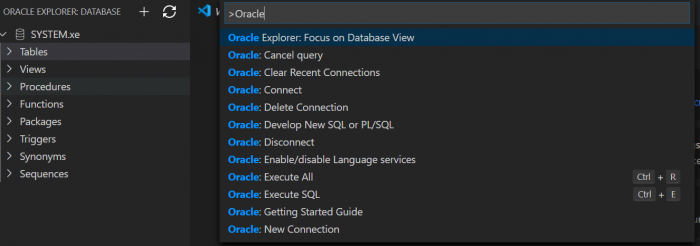
If the connection is successful, you can find database objects like following picutre.

Step3 : Executing SQL
When you press ‘F1’ and input ‘oracle’, you can get ‘Develop New SQL or PL/SQL’ option, so click it.

Next, you choice which database to connect.

Then editor tab shows up, you write any test code like following and execute ‘Ctrl’ + ‘e’
select * from v$version;The output is here.

Summary
Oracle Developer plugin make SQL and execute it easily. Please try it.
